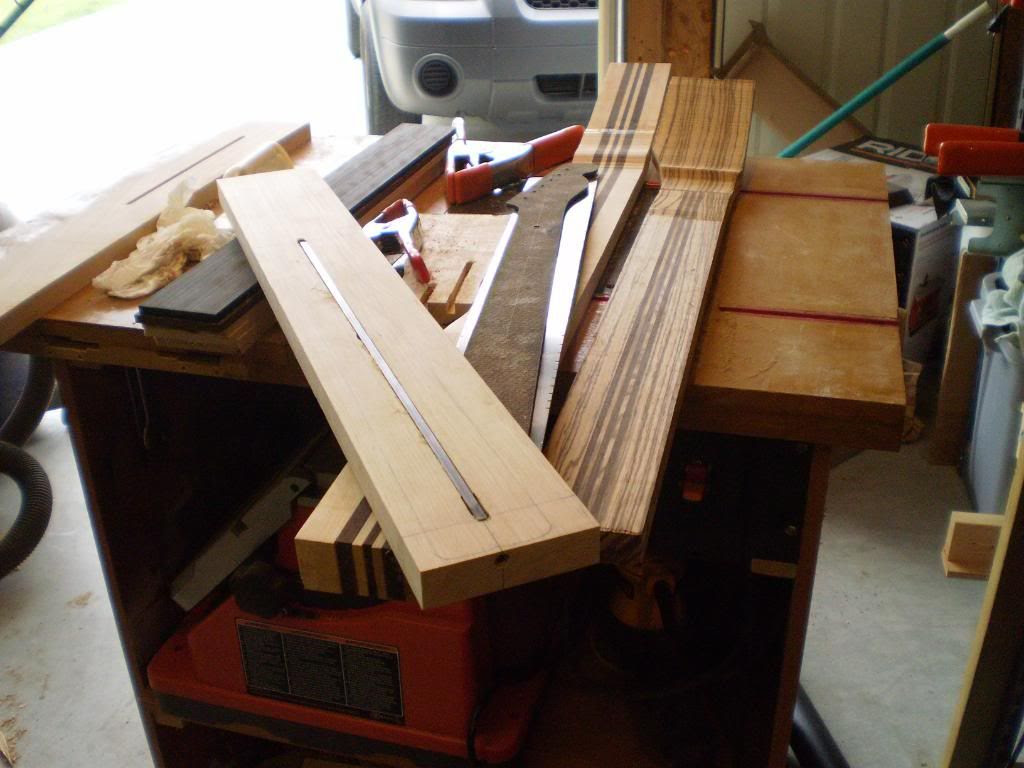
Did the rough profile on the neck as well... if you are out in the shop at 11:00PM then you might as well make the most of it.
Friday, April 30, 2010
7 B
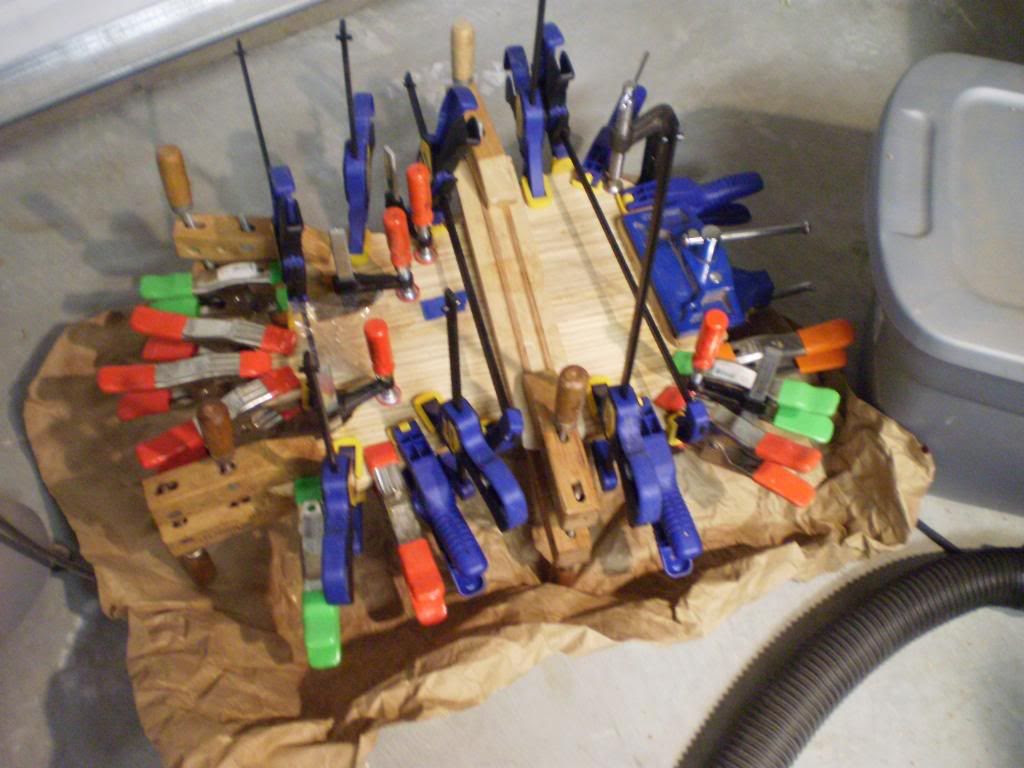
Got my Zebra top in the mail. It looked better in the pictures. The lines are not as dark as I would like guess I will fix it up later. First up flatten, then join, then lay it face down and trace out the shape. After a trip to the bandsaw we are ready for glue. This is a Drak (great telecaster builder) like adventure... I got tired of joining the tops, sanding, then trying to orient them on the blank. So now I glue one side and clamp it on center. Then I glue the other side. First clamps that go on are the ones that pull the top together to make the seem tight. Then I throw my curved brace across the top and clamp each end to pull the middle in. Lastly I run around the edges clamping down and cleaning excess glue. It is a pain but it is quicker than the old 2 step process.


Did the rough profile on the neck as well... if you are out in the shop at 11:00PM then you might as well make the most of it.


Did the rough profile on the neck as well... if you are out in the shop at 11:00PM then you might as well make the most of it.
Skunk Stripes
On the necks that had the accident... I was able to clean up all the tear out and now have several necks to finish. On the one that the bit rode through and I decided on a skunk stripe. I learned some interesting things about skunk stripes and double action trussrods.
DON'T DO IT.
When you make a skunk stripe and it is really tight it squeezes the glue out as you press it in. Then the first time you try to adjust your Double Action Trussrod it presses against the glue starved skunk stripe and BAM! It pops out the back... Thank you TDPRI. I thought it was a silly idea when I was looking at it but was glad to confirm my thoughts. On this skunk stripe it does not go all the way through except in a small spot. It also is not as long as a regular stripe so I should be ok. The strip was not overly tight and it had 3 sides to glue to instead of just 2. So in retrospect if you add a skunk stripe and are using a double action trussrod do not route the channel all the way through. I figure the skunk stripe to be a nice 1/8" thick when I am done.
Tuesday, April 27, 2010
Headplate
Wenge headstock plate with a maple strip underneath. Makes a nice line on the side. I am still trying to decide if this is it for the headstock or I do a raised center.


Spiral bits
Working on the back of the guitar since the top hasn't arrived yet. To start I knocked off the high glue line and drew the outline of the template on the blank. Next up bandsaw the body really close to the template with a 1/4" blade. Attach the template with tape and move to the new router table. Hopefully the new spiral template bit will help with any tear out.


After a pass with the spiral template bit the edge is so smooth that it doesn't need to be sanded. I think it might have been worth the $72.50. The few marks in the template are from were the bandsaw blade was a little too close to the template.


After a pass with the spiral template bit the edge is so smooth that it doesn't need to be sanded. I think it might have been worth the $72.50. The few marks in the template are from were the bandsaw blade was a little too close to the template.
Monday, April 26, 2010
V work little
I decided to cut an angled back plate rather than butchering up the neck blank. Did this on the drum sander attached to another neck blank. It worked well enough.


Glued some small spacers in and the angled backplate. When I was cleaning up I broke the corner off the headplate...grrr.


Glued some small spacers in and the angled backplate. When I was cleaning up I broke the corner off the headplate...grrr.
Harlequin
Harlequin
5 string bass. With melted top.
Neck through 36" blank. 5 piece. maple/wenge/maple/wenge/maple
Neck : Wenge/Flame Maple
Fretboard : Ebony/Flame Maple
Scale : 34
Frets : 24
Trussrod : Warmoth
Body : Ebony/Black Limba/Flame Maple
Tuners : Hipshot HB6Y 3/8” Ultralite black (should be 3 bass side/2 treble side)
Pickups : Seymour Duncan SMB-5d (stingray replacement)
Bridge : Hipshot5 String TransTone Bass Bridge Black
Electronics : Volume Push/Pull switch Stackknob gold (thinking running volume and tone on one knob total)
Measurements:
Scale/Length 864mm/34"
Width at Nut 45mm (0th) (1.77")
Width Last Fret 67mm (24th)
Thickness 1st Fret 19.5mm
Thickness 12th Fret 21.5mm
Radius 305mm
Width at Bridge 71.8mm (2.83")
36" blank. 5 piece. maple/wenge/maple/wenge/maple
Starting on my first bass guitar. This should be interesting.


Neck blank has been sitting for 6 months and I am now going to start work on it. Doing a headstock scarf with headplate and possibly a backstrap.


5 string bass. With melted top.
Neck through 36" blank. 5 piece. maple/wenge/maple/wenge/maple
Neck : Wenge/Flame Maple
Fretboard : Ebony/Flame Maple
Scale : 34
Frets : 24
Trussrod : Warmoth
Body : Ebony/Black Limba/Flame Maple
Tuners : Hipshot HB6Y 3/8” Ultralite black (should be 3 bass side/2 treble side)
Pickups : Seymour Duncan SMB-5d (stingray replacement)
Bridge : Hipshot5 String TransTone Bass Bridge Black
Electronics : Volume Push/Pull switch Stackknob gold (thinking running volume and tone on one knob total)
Measurements:
Scale/Length 864mm/34"
Width at Nut 45mm (0th) (1.77")
Width Last Fret 67mm (24th)
Thickness 1st Fret 19.5mm
Thickness 12th Fret 21.5mm
Radius 305mm
Width at Bridge 71.8mm (2.83")
36" blank. 5 piece. maple/wenge/maple/wenge/maple
Starting on my first bass guitar. This should be interesting.
Neck blank has been sitting for 6 months and I am now going to start work on it. Doing a headstock scarf with headplate and possibly a backstrap.
Telecasters continued
Ok I have thought about it. For now I am starting over with new blanks. I also decided to cut fretboards from the same boards... 6/4 solid rock maple. This has to be one of the hardest pieces I have ever had. I am going to try and clean up the other blanks later but the headstocks will not be perfect telecasters so I will use them on some other Ts I am going to build this year.


Had to fix my tools to get going. The maple was so hard my regular resaw fence didn't work. The blade keep drifting so I built a single point resaw fence. It worked ok but you really have to pay attention as you run through or you will destroy a blank.

Also bought a new router table to try and combat tear out. The MLCS Heavyweight Router table. 120lb beast.


Of course a gratuitous shot of my temporary paint booth.


New router table. New spiral upcut bit. New router accidents. I broke my double flute carbide 1/4" bit I had had for 20 years so I switched to a new spiral upcut. Well I was afraid I was feeding it to fast so on the first neck I went slow. The lack of pressure on the spiral caused it to vibrate. The vibration loosened the collar and the bit rode up and cut through... The solution is a skunk stripe. That is why I am building 4. I test on the first one then do the other three after I am sure that is how I want to proceed.


So rather than a traditional T neck I decide to use double expanding rods and put a fretboard on the necks. For me it is just easier to not modify my process to much. I will attempt some classic one piece T necks later but for now this is how the trussrods were installed.


Had to fix my tools to get going. The maple was so hard my regular resaw fence didn't work. The blade keep drifting so I built a single point resaw fence. It worked ok but you really have to pay attention as you run through or you will destroy a blank.
Also bought a new router table to try and combat tear out. The MLCS Heavyweight Router table. 120lb beast.
Of course a gratuitous shot of my temporary paint booth.
New router table. New spiral upcut bit. New router accidents. I broke my double flute carbide 1/4" bit I had had for 20 years so I switched to a new spiral upcut. Well I was afraid I was feeding it to fast so on the first neck I went slow. The lack of pressure on the spiral caused it to vibrate. The vibration loosened the collar and the bit rode up and cut through... The solution is a skunk stripe. That is why I am building 4. I test on the first one then do the other three after I am sure that is how I want to proceed.
So rather than a traditional T neck I decide to use double expanding rods and put a fretboard on the necks. For me it is just easier to not modify my process to much. I will attempt some classic one piece T necks later but for now this is how the trussrods were installed.
Subscribe to:
Posts (Atom)